
From seed to harvest in 7 steps
A complete, plain-English guide for home growers. Skim the 7 steps in five minutes, then open “Read more” for the details that make the difference.
- 9–12 weeksautoflower, seed to harvest
- 3–5 monthsphotoperiod, seed to harvest
- Mid-Mayplant out in NL
What you need
- Pots with drainage holes
- Light, airy potting soil
- Perlite (for drainage)
- Mild grow + bloom feed
- pH test drops or meter
- Thermometer / hygrometer
- Watering can + spray bottle
- Soft plant ties
- Jeweller’s loupe (30–60×)
- Small scissors
- Glass jars with lids
Growing indoors? Add:
- Grow tent
- LED grow light
- Extraction fan + carbon filter
- Timer
- Small clip-on fan
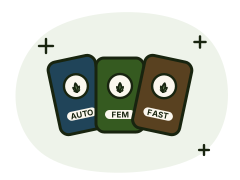
Pick your seed
Autoflowers start flowering by themselves after a few weeks, whatever the daylight. They stay compact and are the easiest start. Feminized (photoperiod) plants flower when the nights get longer, grow bigger and take longer. Fast versions sit in between: photoperiod plants that finish weeks earlier.
Growdude tipNew to growing, or growing outdoors up north? Start with an autoflower or a fast version.
Read more: pick your seed in detail
- Autoflower
- Seed to harvest in about 9–12 weeks. Plants usually stay 50–120 cm. They cannot be "paused" in the growing stage, so mistakes in the first weeks cost harvest. Plant them straight into their final pot.
- Feminized
- You decide when they flower (indoors) or the season does (outdoors). More time means bigger plants and more control, but outdoors in the north they need to finish before the October rain.
- Fast version
- A photoperiod plant with some autoflower genetics. It still reacts to the season, but finishes 1–3 weeks earlier. A good middle ground for Dutch and North-European summers.
- CBD strains
- Bred for high CBD and low THC. They grow the same way as the other types; check the label for whether it is an auto or a photoperiod.
- Read the specs
- Look at flowering time, outdoor harvest month, height and difficulty. For outdoors up north, the harvest month matters more than anything else: aim for September or early October at the latest.
- Storing seeds
- Keep seeds cool, dark and dry, ideally in an airtight container in the fridge (not the freezer). Stored like that they stay good for years. Let the container reach room temperature before opening so no condensation forms.
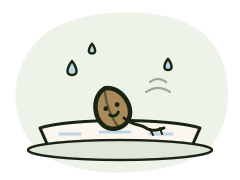
Germinate
Put the seed between two sheets of damp (not soaking) kitchen paper on a plate. Cover it and keep it warm and dark, around 20–25 °C. Within 1–5 days a small white root appears. Once it is about 1 cm long, plant it root-down, about 1 cm deep.
Growdude tipTouch the root as little as possible. Clean hands or tweezers only.
Read more: germinate in detail
- Optional soak
- Old or very hard seeds can first soak in a glass of room-temperature water for 12–24 hours. When they sink, move them to the paper. Do not leave them in water for longer than a day.
- Keep it steady
- The paper must never dry out, but no water should pool on the plate either. A second plate on top keeps moisture in. A spot on top of a router or fridge is often just warm enough.
- Direct sowing
- You can also sow straight into a small pot of moist soil, about 1 cm deep. Fewer steps and no handling of the root, but you cannot see what is happening. This works well for autoflowers.
- Planting the sprout
- Make a small hole with a pencil, lower the seed in with the root pointing down, cover loosely and mist the top. Do not press the soil hard. The seedling usually breaks the surface within 1–3 days.
- No root after 5 days?
- Give it up to 7 days at the right temperature. Cold is the most common cause of slow germination. A seed that has not opened after 10 days will usually not come up.
Seedling
Two round leaves open first, then the first jagged ones. Use a small pot with light, airy soil and give soft light. Water a little at a time, in a small circle around the stem, and only when the top of the soil feels dry.
Growdude tipMost seedlings are lost to too much water, not too little.
Read more: seedling in detail
- Climate
- Seedlings like 20–25 °C and fairly humid air (around 60–70%). A clear cup or cut-off bottle over the pot for the first days helps on a dry windowsill. Lift it daily for fresh air.
- Light
- Indoors: 18 hours light, 6 hours dark, with the lamp dimmed or hung higher than later on. On a windowsill: the sunniest window you have. Tall, thin, wobbly stems mean the seedling wants more light.
- Pot
- Photoperiods can start in a 0.5–1 litre pot and move up later. Autoflowers are best sown in their final pot (10–15 litres) because moving them slows them down.
- Feeding
- None. Ordinary potting soil holds enough food for the first 2–3 weeks. Extra feed now burns the young roots.
- Watering amount
- A few tablespoons around the stem every day or two is often enough in a small pot. In a big pot, water only a small circle around the seedling until the roots grow out.
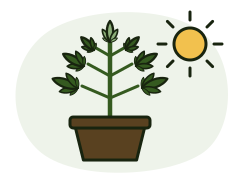
Grow (vegetative stage)
Now the plant builds leaves, stems and roots. Move it to its final pot, give plenty of light (indoors usually 18 hours on, 6 off) and fresh air. Start feeding once it has a few sets of leaves, at half the dose on the label.
Growdude tipOutdoors in the Netherlands, wait until night frost is over: usually mid to late May.
Read more: grow (vegetative stage) in detail
- Final pot
- Indoors 11–25 litres is common; outdoors in pots 25–50 litres. Bigger pots dry out more slowly and give bigger plants. Always use pots with drainage holes and a saucer.
- Moving pots
- Repot when the roots reach the edge of the pot (usually 2–3 weeks after sprouting). Water the plant a day before so the root ball holds together, and plant it at the same depth.
- Watering rhythm
- Water slowly until a little runs out of the bottom, then wait until the pot feels clearly lighter and the top 2–3 cm of soil is dry. Lift the pot to learn the difference in weight.
- Feeding
- Use a grow feed (more nitrogen, the N on the label). Start at a quarter to half the label dose and increase slowly while the leaves stay deep green without burnt tips.
- Climate
- About 20–28 °C during the day and 50–70% humidity. A small fan that gently moves the leaves makes stems stronger and keeps mould and pests away.
- Shaping the plant
- Gently bend and tie the main stem sideways (low-stress training). The plant then grows several even tops instead of one tall one, which uses light better. Topping (cutting off the main tip) works for photoperiods; with autoflowers, stick to gentle bending.
- Outdoors
- Pick the sunniest spot you have: at least 6 hours of direct sun, sheltered from strong wind. Get the plant used to the outdoors over a week (a few hours a day at first). Protect young plants from slugs.
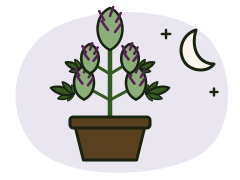
Flowering
Photoperiod plants switch to flowering when nights get long: indoors at 12 hours of darkness, outdoors from around August. Autoflowers do it on their own. Buds form and fill out. Switch to a bloom feed and keep the air fairly dry.
Growdude tipPhotoperiods need real darkness at night. Even a lamp left on can delay flowering.
Read more: flowering in detail
- The stretch
- In the first 2–3 weeks of flowering a plant can grow 50–100% taller. Indoors, switch to 12/12 when the plant is about half the height you have room for.
- Bloom feed
- Switch to a bloom feed (more phosphorus and potassium, the P and K on the label) when the first white hairs appear. Lower yellowing leaves in the last weeks are normal: the plant is using its reserves.
- Humidity
- Keep it lower than before: about 40–50%, and lower still in the last weeks. Dense buds in damp air are where mould starts.
- Temperature
- About 20–26 °C during the day, a few degrees cooler at night. Strong heat in flowering costs smell and quality.
- Pollen sacs
- Feminized seeds give female plants, but heavy stress (light leaks, heat, damage) can make a plant form small pollen sacs or "bananas" between the buds. Remove them carefully as soon as you see them.
- Outdoors in the north
- From late August, check dense buds after every rainy spell. A simple roof or overhang against rain (a balcony, a sheet of clear plastic) lowers the risk of bud rot a lot.
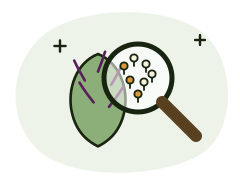
Harvest
Look at the tiny resin heads (trichomes) with a jeweller’s loupe or your phone’s macro lens. Clear means too early. Milky means ready. A few amber ones mean you are at the late end of the window. Most of the little hairs will have darkened and curled in.
Growdude tipTrust the buds, not the calendar. Flowering times on the pack are a guide.
Read more: harvest in detail
- Where to look
- Check the trichomes on the buds themselves, not on the small sugar leaves around them: those often turn amber earlier.
- Clear → milky
- Mostly clear: wait. Mostly milky with a few amber: the classic harvest moment. Many amber: later in the window, often described as a heavier, more relaxing effect.
- Last weeks
- Many growers give only plain water in the last 1–2 weeks. Opinions differ on how much difference it makes, but it does no harm to a healthy plant.
- Bad weather
- Outdoors, if a long wet spell is coming and the buds are mostly milky, harvesting a few days early is better than losing buds to rot.
- How to cut
- Cut whole branches or the whole plant. Remove the big fan leaves straight away; the small leaves around the buds can be trimmed now or after drying.
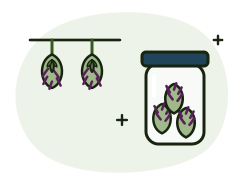
Dry & cure
Hang the branches upside down in a dark, airy room at about 18–21 °C and 55–60% humidity. When small stems snap instead of bend, trim and put the buds in airtight glass jars. Open the jars for a few minutes every day for the first one to two weeks.
Growdude tipSlow is good. Heat or a fan aimed straight at the buds dries them too fast.
Read more: dry & cure in detail
- Drying room
- A closet, attic or tent works. Darkness protects colour and smell. Air should move in the room, but not blow directly on the buds. A cheap thermometer/hygrometer tells you if you are in range.
- How long
- Usually 7–14 days. Faster than a week usually means it is too warm or too dry; slower than two weeks means too damp, so check for mould.
- Filling jars
- Fill glass jars about three quarters full and close them. If the buds feel damp again the next day, leave the lid off for an hour.
- Burping
- Open each jar for 5–15 minutes every day in the first 1–2 weeks, then once a week. A small hygrometer in the jar should read about 58–62%.
- Curing time
- Two weeks makes a clear difference in smell and smoothness; four to eight weeks is better still. Store finished jars cool and dark.
The basics: soil, water, light and air
Soil & pots
- Use light potting soil and mix in 20–30% perlite so water drains and roots get air.
- Pre-fertilised soil feeds the plant for about the first 3–4 weeks.
- Fabric pots let roots breathe and make overwatering harder; plastic pots hold water longer.
Water & pH
- Use water at room temperature. Water until a little runs out, then wait until the pot is light again.
- In soil the plant takes up food best at a pH of about 6.0–7.0. In coco or hydro: 5.5–6.5.
- Dutch tap water is often slightly alkaline. Measure once; if it is far above 7, a few drops of pH-down fix it.
Light
- Photoperiods indoors: 18 hours on / 6 off while growing, 12 / 12 to flower. Autoflowers: 18 / 6 or 20 / 4 from start to finish.
- As a rough guide, a good LED of 100–150 W (real power use) suits a 60×60 cm tent; 200–250 W an 80×80 cm tent.
- Hang the lamp at the distance the maker advises. Outdoors: at least 6 hours of direct sun.
Air & climate
- Day temperature 20–28 °C. Humidity: 60–70% for seedlings, 50–70% while growing, 40–50% in flowering.
- Fresh air in, used air out. Indoors, a carbon filter on the extraction fan keeps the smell in.
- A gentle fan makes stems stronger and keeps mould and pests away.
Indoor or outdoor?
Indoors
- Full control of light, climate and timing
- Grow any time of year, any strain (also long hazes)
- No weather, fewer pests
- Costs for a tent, light, fan and electricity
- Smaller plants, more daily attention
- Smell needs a carbon filter
Outdoors
- Free sunlight, low start-up costs
- Room for bigger plants
- A relaxed, natural way to grow
- One season (mid-May to mid-October up north)
- Rain, cold nights and bud rot in autumn
- Slugs, caterpillars and curious neighbours
Best picks for the Netherlands: autoflowers, fast versions and early photoperiods.
Outdoor calendar for the Netherlands
Plant out after the last night frost (mid-May). Be done by mid-October: autumn rain and cold nights bring bud rot.
- April – early MayStart seeds indoors on a sunny windowsill.
- Mid – late MayPlant out after the last frost. Watch for slugs.
- June – JulyMain growth. Water in dry spells; start a 2nd autoflower run in early July.
- AugustPhotoperiods start flowering. First autoflower harvest. Check for caterpillars.
- September – mid-OctoberHarvest time. Check buds after every rainy day for rot.
Typical windows, indicative. Weather, strain and spot all shift them. Long hazes finish too late outdoors here: grow those indoors.
Problems & fixes
Most problems show up in the leaves first. Find what you see, then check the likely cause.
Let the pot dry out properly. Add perlite next time and make sure water can run out.
Water slowly in several rounds until a little runs out. The plant perks up within hours.
Skip feeding for a week and give plain water; then feed at a lower dose.
Feed grow nutrients. (In the last weeks of flowering this yellowing is normal.)
Measure the pH of your water and adjust it. Then feed normally again.
Lamp closer or brighter; outdoors, a sunnier spot.
Raise the lamp or dim it, and check the temperature at the top of the plant.
Check under the leaves. Rinse with water, raise humidity and use predatory mites (biological control).
Spray them off with water or a mild soap solution (only before flowering). Ladybirds help outdoors.
Check buds from August onwards and remove them. A biological spray with Bt before flowering prevents most damage.
Cut it out generously and throw it away. Improve airflow; outdoors, harvest early in a long wet spell.
Remove the worst leaves, increase airflow and lower humidity. Act early: it spreads fast.
Frequently asked questions
How long does it take from seed to harvest?
Autoflowers take about 9–12 weeks from seed. Photoperiod plants take about 3–5 months, depending on how long you let them grow before flowering. Add 1–2 weeks for drying.
Should I start with an autoflower or a feminized seed?
For a first grow, or outdoors in a northern climate, an autoflower or a fast version is the easiest choice. Feminized photoperiods give more control and bigger plants, but take longer and are less forgiving of a short summer.
When can I put plants outside in the Netherlands?
After the last night frost, usually from mid-May. You can start seeds indoors on a sunny windowsill from late April and move them out once the nights stay above about 10 °C.
Why are my seedlings tall and floppy?
They are reaching for light. Move them to a brighter spot or bring the lamp closer. You can plant a stretched seedling a bit deeper when you repot it to support the stem.
Why are my leaves turning yellow?
Lower leaves yellowing in the growing stage usually means a shortage of nitrogen. Yellowing with spots can be a pH problem. In the last weeks of flowering yellow leaves are normal. See Problems & fixes above.
Do I need nutrients?
Not for the first 2–3 weeks in good potting soil. After that, a simple grow feed and later a bloom feed is enough. Start at half the label dose; more is not better.
How often should I water?
There is no fixed schedule. Water when the pot feels light and the top few centimetres of soil are dry. Small plants in big pots need less water than you think.
A seed did not sprout. What now?
Give it up to 7 days at 20–25 °C before you give up. Cold and too much water are the most common causes. If several seeds from one pack do not open, contact us.
How do I store seeds I am not using yet?
Cool, dark and dry: an airtight container in the fridge works well. Stored like that, seeds stay good for years.
Ready to pick your seed?
Every Growdude strain shows its type, difficulty and outdoor harvest month up front.
Laws on growing cannabis differ per country. Check what is allowed where you live before you start.